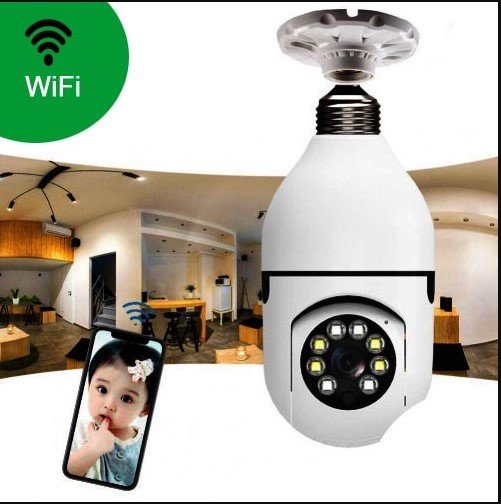
how to install and configure a wifi camera
Installing and configuring a Wi-Fi camera involves several steps, from choosing the right camera to connecting it to your network and configuring it for optimal use. Here’s a general guide:
1. Choose the Right Camera
- Type: Determine the type of camera you need (indoor, outdoor, dome, bullet, etc.).
- Resolution: Choose a camera with appropriate resolution (e.g., 1080p, 4K).
- Power Source: Decide if you want a battery-powered or plug-in camera.
- Smart Features: Consider features like night vision, motion detection, two-way audio, etc.
2. Unbox and Prepare the Camera
- Contents: Ensure the box contains the camera, power adapter, mounting hardware, and a user manual.
- Charge/Power Up: If it’s battery-operated, charge it fully. If it’s plug-in, connect it to a power source.
3. Download the App
- Most Wi-Fi cameras come with a companion app. Download the app from the App Store (iOS) or Google Play Store (Android).
- Create an Account: If required, create an account within the app.
4. Connect the Camera to Wi-Fi
- Turn on the Camera: Ensure the camera is powered on.
- Open the App: Follow the instructions in the app to add a new device.
- Pairing Mode: Some cameras may need to be put into pairing mode. This is often done by pressing a button on the camera.
- Wi-Fi Setup: Select your Wi-Fi network from the list and enter the password. Ensure the camera and your phone are on the same network (usually a 2.4GHz network).
- Connect: The camera should now connect to your Wi-Fi network. This may take a minute.
5. Mount the Camera
- Location: Choose a location that provides a clear view and is within Wi-Fi range.
- Mounting: Use the provided hardware to mount the camera. Ensure it’s secure and positioned correctly.
- Power: If the camera is plug-in, ensure the power cable reaches the outlet.
6. Configure the Camera Settings
- App Settings: Within the app, you can typically adjust various settings:
- Resolution: Set the video resolution.
- Motion Detection: Enable and configure motion detection sensitivity and zones.
- Alerts: Set up notifications for motion or sound alerts.
- Recording: Choose whether to record continuously, only when motion is detected, or at scheduled times.
- Storage: Configure local storage (SD card) or cloud storage options.
7. Test the Camera
- View Live Feed: Check the live feed through the app to ensure the camera is working properly.
- Test Features: Test motion detection, alerts, and any other features you’ve configured.
- Adjust as Needed: Make any necessary adjustments to the camera’s position or settings based on your tests.
8. Secure Your Camera
- Change Default Passwords: If the camera has a default password, change it to a strong, unique one.
- Firmware Updates: Ensure the camera’s firmware is up to date. Check for updates periodically.
- Privacy Settings: Review the camera’s privacy settings in the app to control who has access to the feed.
9. Maintenance
- Regular Checks: Periodically check the camera’s functionality, clean the lens, and ensure it’s securely mounted.
- Battery: If battery-operated, monitor the battery level and recharge as needed.
Additional Tips:
- Signal Strength: If the Wi-Fi signal is weak, consider moving the camera closer to the router or using a Wi-Fi extender.
- Weatherproofing: For outdoor cameras, ensure they are weatherproof and positioned to avoid direct exposure to elements like rain or direct sunlight.
Following these steps should help you successfully install and configure your Wi-Fi camera.
Here are some additional tips and advanced configurations to optimize your Wi-Fi camera setup:
10. Optimize Camera Placement
- Field of View: Ensure the camera covers the desired area without obstructions. Avoid positioning it where bright lights or direct sunlight can cause glare.
- Height: Mount the camera at a height where it’s out of reach from tampering but still provides a clear view. Typically, 7-10 feet above the ground is ideal for outdoor cameras.
- Angle: Adjust the camera angle to minimize blind spots and ensure you capture crucial areas like doorways, windows, or driveways.
11. Network Configuration
- Separate SSID for IoT Devices: Consider setting up a separate Wi-Fi network (SSID) for your IoT devices, including cameras. This can improve security by isolating these devices from your main network.
- Quality of Service (QoS): If your router supports QoS, prioritize traffic to the camera, especially if you have multiple devices on the network. This ensures a stable connection for the camera, reducing lag or dropouts.
- Bandwidth Consideration: Wi-Fi cameras, especially high-resolution ones, can consume significant bandwidth. Ensure your network can handle the load, particularly if you have multiple cameras.
12. Cloud Storage vs. Local Storage
- Cloud Storage: Many cameras offer cloud storage for video clips. This can be convenient but often requires a subscription. It provides access to recordings from anywhere and offers off-site storage, which is useful if the camera is tampered with or stolen.
- Local Storage: Cameras with SD card slots or those that support network-attached storage (NAS) allow for local recording. This can be more cost-effective but requires management of storage space and may be vulnerable to theft.
- Hybrid Approach: Some systems allow both cloud and local storage, providing a backup in case one fails.
13. Integrate with Smart Home Systems
- Smart Assistants: Integrate your Wi-Fi camera with smart home ecosystems like Amazon Alexa, Google Assistant, or Apple HomeKit. This allows you to control the camera with voice commands or view the feed on smart displays.
- Automation: Set up automation routines. For instance, you can create a routine to turn on lights when motion is detected by the camera or to start recording when you leave home.
- IFTTT: Use the “If This Then That” (IFTTT) service to create custom automations involving your camera and other smart devices.
14. Security Best Practices
- Two-Factor Authentication (2FA): Enable 2FA on your camera’s account if available. This adds an extra layer of security beyond just the password.
- Disable Unused Features: If you don’t need certain features like remote access or voice control, consider disabling them to reduce potential vulnerabilities.
- Regular Firmware Updates: Periodically check for firmware updates from the manufacturer to patch security vulnerabilities and add new features.
15. Privacy Considerations
- Geofencing: Some cameras support geofencing, which can automatically disable the camera or turn off motion alerts when you’re home to protect privacy.
- LED Indicators: Most cameras have an LED light that indicates when they’re recording or in use. This can be a deterrent to intruders but may also raise privacy concerns. Check if you can disable or customize the LED behavior in the settings.
- Privacy Zones: Some cameras allow you to define privacy zones within the camera’s field of view. These areas won’t be recorded, which is useful if the camera overlooks public areas or a neighbor’s property.
16. Advanced Motion Detection Settings
- Activity Zones: Configure specific areas within the camera’s view to monitor for motion. This reduces false alerts by focusing only on critical areas like entry points.
- Sensitivity Adjustment: Adjust the sensitivity of motion detection to avoid false positives from pets, trees, or passing vehicles.
- AI-Powered Detection: Some advanced cameras offer AI-powered features like person detection, which can distinguish between people, animals, and objects, reducing unwanted alerts.
17. Troubleshooting Common Issues
- Connection Drops: If the camera frequently disconnects, ensure it’s within range of the router, and there are no significant physical obstructions. You may need a Wi-Fi extender or a wired connection via Ethernet if possible.
- Slow Live Feed: This could be due to insufficient bandwidth or network congestion. Reduce the video resolution or limit the number of devices using the network simultaneously.
- App Issues: If the app isn’t functioning correctly, try restarting it, updating to the latest version, or reinstalling it. Check for device compatibility as well.
18. Expanding Your System
- Multiple Cameras: If you plan to add more cameras, ensure your Wi-Fi network can handle the additional load. Many apps allow you to manage multiple cameras from a single interface.
- Home Security System Integration: Consider integrating your Wi-Fi camera with a broader home security system for enhanced protection, including door/window sensors, alarms, and more.
- Video Doorbells: Combine your Wi-Fi camera setup with a video doorbell for complete coverage of your entry points.
19. Legal Considerations
- Privacy Laws: Be aware of local laws regarding video surveillance, especially concerning recording in public spaces or areas where others have a reasonable expectation of privacy (like neighbors’ property).
- Consent: In some regions, you may need consent from individuals before recording audio or video. Make sure you comply with local regulations.
20. Regular Maintenance
- Clean the Lens: Periodically clean the camera lens with a soft cloth to prevent dirt, dust, or spider webs from obscuring the view.
- Check for Obstructions: Trim any branches or foliage that may grow and obstruct the camera’s view over time.
- Software Maintenance: Regularly check for software updates to the camera and the app to ensure optimal performance and security.
These additional steps and tips should help you not only set up but also optimize and maintain your Wi-Fi camera system for long-term use.