how to configure & install wifi-wireless-camera
Configuring and installing a Wi-Fi wireless camera involves several steps, typically starting with unboxing and setting up the hardware, then connecting it to your Wi-Fi network, and finally configuring the camera settings via an app or web interface. Here’s a general guide to help you get started:
1. Unbox and Prepare the Camera
- Unbox the Camera: Carefully unbox the camera and check that all necessary accessories are included (e.g., power adapter, mounting bracket, screws, manual).
- Charge/Power Up: If the camera is battery-powered, ensure it is fully charged. If it’s plug-in, connect it to a power source using the provided adapter.
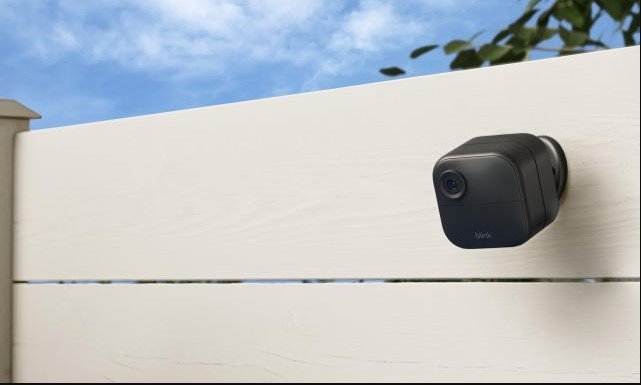
2. Install the Camera
- Mount the Camera (Optional): If you plan to mount the camera, choose a location that provides a good view of the area you want to monitor. Use the included hardware to secure it.
- Positioning: Ensure the camera is positioned within range of your Wi-Fi signal and in a location where it can be easily accessed for future maintenance or adjustments.
3. Download and Install the Companion App
- Download the App: Most Wi-Fi cameras come with a companion app that you’ll need to download. Look for the app name in the camera’s manual or packaging. It’s usually available on the App Store (iOS) or Google Play Store (Android).
- Create/Log in to Your Account: Open the app and create an account if you’re a new user, or log in if you already have an account.
4. Connect the Camera to Wi-Fi
- Add the Camera in the App:
- Open the app and follow the instructions to add a new device.
- Typically, you’ll need to select your camera model from a list.
- Enter Wi-Fi Details:
- The app will prompt you to connect the camera to your Wi-Fi network.
- Enter your Wi-Fi network’s name (SSID) and password.
- Pairing:
- Some cameras may require you to scan a QR code displayed on your phone with the camera, or press a physical button on the camera to initiate pairing.
5. Configure Camera Settings
- Adjust Settings: After the camera is connected, use the app to adjust settings like motion detection sensitivity, recording schedules, alerts, video quality, and more.
- Firmware Update: Check for any available firmware updates for the camera and install them through the app if necessary.
6. Test the Camera
- Live View: Use the app to view the camera’s live feed and test the video quality.
- Motion Detection: Test motion detection and alerts to ensure the camera is functioning as expected.
- Two-Way Audio (if available): Test the two-way audio feature if your camera supports it.
7. Secure the Camera
- Change Default Password: If the camera has a default admin password, change it to something secure.
- Enable Encryption: Ensure that video feeds are encrypted (most modern cameras do this by default).
- Set Up Notifications: Configure notifications for motion detection, sound alerts, or other features depending on your preferences.
8. Access and Monitor Remotely
- Remote Access: You should now be able to access the camera feed remotely using the app when you’re away from home.
9. Troubleshooting (if needed)
- Connection Issues: If the camera fails to connect to Wi-Fi, ensure the network password is correct, the camera is within range, and that the network is not overloaded.
- Reset the Camera: If issues persist, consult the manual for instructions on resetting the camera to factory settings and start the setup process again.
Each camera brand or model might have specific steps, so always refer to the user manual provided with the camera for detailed instructions.
Here are some additional steps and considerations for configuring and installing a Wi-Fi wireless camera:
10. Advanced Configuration Options
- Set Up Cloud Storage: Many Wi-Fi cameras offer cloud storage for recorded footage. You can subscribe to a cloud plan through the camera’s app and configure it to automatically upload recordings.
- Local Storage: If your camera supports local storage (e.g., microSD card), install the card in the camera and set up the recording settings in the app. Choose between continuous recording or recording only when motion is detected.
- Integrate with Smart Home Systems: If your camera is compatible with smart home systems (like Alexa, Google Assistant, or Apple HomeKit), you can integrate it to control the camera via voice commands or automate it with other smart devices.
11. Camera Placement Tips
- Optimal Coverage: Place the camera in a location that covers the widest area you want to monitor. Common spots include entrances, garages, backyards, or any areas where valuables are stored.
- Height and Angle: Install the camera at a height that prevents it from being tampered with (typically 7-10 feet above the ground). Angle it downward to cover the area effectively.
- Lighting Considerations: Ensure that the camera isn’t pointed directly at bright light sources, which can cause glare or poor image quality. If your camera has night vision, avoid placing it near reflective surfaces that might bounce the infrared light back into the lens.
12. Network Considerations
- Wi-Fi Band (2.4 GHz vs. 5 GHz): Most wireless cameras operate on the 2.4 GHz band, which offers better range but slower speeds compared to 5 GHz. Ensure your Wi-Fi router broadcasts a 2.4 GHz signal, and connect the camera to that band.
- Wi-Fi Extender: If your camera is installed far from the router, consider using a Wi-Fi extender to boost the signal and ensure a stable connection.
- Bandwidth: Wi-Fi cameras can consume significant bandwidth, especially if they’re streaming in HD or 4K. Ensure your internet connection can handle the load, particularly if you have multiple cameras.
13. Managing Multiple Cameras
- App Organization: If you’re using multiple cameras, most apps allow you to organize them by location or assign names to easily identify each one.
- Multi-Camera Viewing: Some apps support viewing multiple camera feeds simultaneously. Explore the app’s features to set up a multi-camera view.
- Group Notifications: If you have multiple cameras in different locations, set up group notifications so you receive alerts only from the cameras you need to monitor closely.
14. Regular Maintenance
- Firmware Updates: Regularly check for firmware updates through the app. Keeping your camera’s firmware up-to-date ensures it has the latest security patches and features.
- Lens Cleaning: Periodically clean the camera lens with a microfiber cloth to prevent dust or dirt from affecting image quality.
- Battery Maintenance: For battery-powered cameras, monitor the battery level through the app and recharge or replace the batteries as needed. Some apps will send alerts when the battery is low.
15. Privacy and Security
- Secure Your Wi-Fi Network: Ensure your Wi-Fi network is secured with a strong password and WPA3 encryption if your router supports it.
- Guest Network: Consider setting up a guest network for your cameras to isolate them from your main network, adding an extra layer of security.
- Disable Remote Access When Not Needed: If you don’t need to access the camera remotely, disable remote access in the settings to reduce potential vulnerabilities.
16. Environmental Considerations
- Weatherproofing: For outdoor cameras, ensure they are rated for your local weather conditions (e.g., rain, snow, extreme heat). Most outdoor cameras come with an IP rating that indicates their resistance to dust and water.
- Sunlight Exposure: Prolonged exposure to direct sunlight can damage the camera or affect the image quality. Install it in a shaded area if possible.
- Temperature Tolerance: Check the camera’s operating temperature range to ensure it functions well in your climate, especially if you experience extreme temperatures.
17. Notifications and Alerts
- Motion Zones: Configure motion zones in the app to specify areas within the camera’s field of view where you want to detect motion. This helps reduce false alarms from areas like roads or trees.
- Notification Sensitivity: Adjust the sensitivity of motion detection to balance between catching important events and avoiding unnecessary alerts.
18. Legal Considerations
- Privacy Laws: Be aware of local privacy laws regarding video surveillance. In many regions, it’s illegal to record video or audio of individuals without their consent, especially in private spaces.
- Neighbor Notifications: If your camera captures areas beyond your property, such as a neighbor’s yard, consider informing them to avoid privacy concerns.
19. Integrating with Other Security Systems
- Alarm Systems: Some cameras can be integrated with home security alarm systems, allowing them to trigger alarms when motion is detected.
- Automation Routines: Use your smart home system to create automation routines, like turning on lights when the camera detects motion at night.
20. Customer Support and Community Resources
- Manufacturer Support: Keep the camera’s support contact information handy in case you encounter any issues. Many manufacturers offer phone, email, or live chat support.
- Online Communities: Join online forums or communities related to your camera brand. These can be valuable resources for troubleshooting, tips, and getting the most out of your camera.
Following these additional steps and considerations will help ensure that your Wi-Fi wireless camera is installed correctly, secure, and optimized for your specific needs.